Embed AI Agent on WIX

I am having the hardest time trying to embed my AI agent into the wix website. I wanted to make sure that it’s member login and the most secure. The embed Mindstudio video says the API is the safest way but doesn’t teach you how to do it that way. It teaches you the more unstable way.

Can you provide a step-by-step on how I can embed my AI agent into my site. I want to have a paywall in front of it, but I also want to make sure that the customer every time they log in we’ll see past runs.

Hi @RacCaz,

Thanks for the post! I put together a quick walkthrough below. I’m still new to Wix myself, so if anyone else has tips or suggestions, feel free to jump in.

Prerequisites:

  • You’ve created a MindStudio Agent and have access to Signed URLs
  • You have a Wix Website

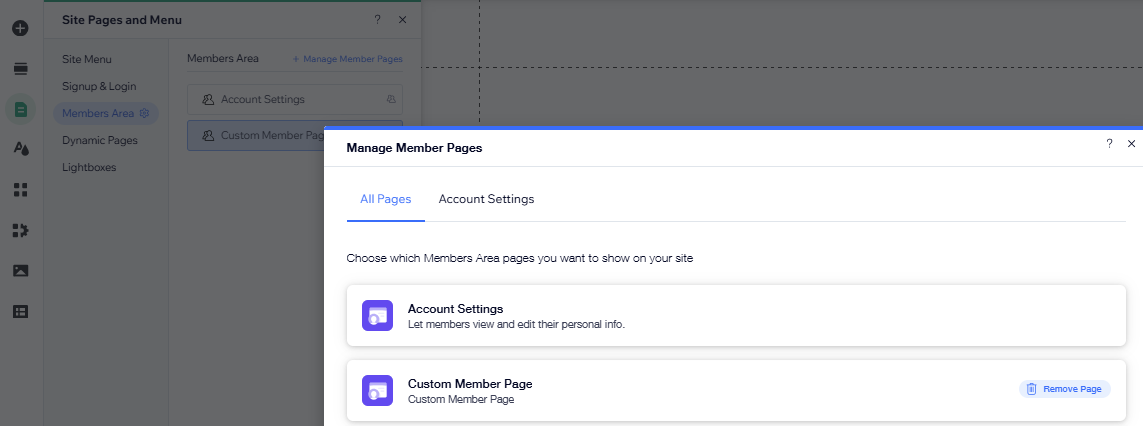
1. Enable User Membership on Your Wix Site

Signed URLs require each user to have their own UID, so we’ll use Wix’s built-in Members Area:
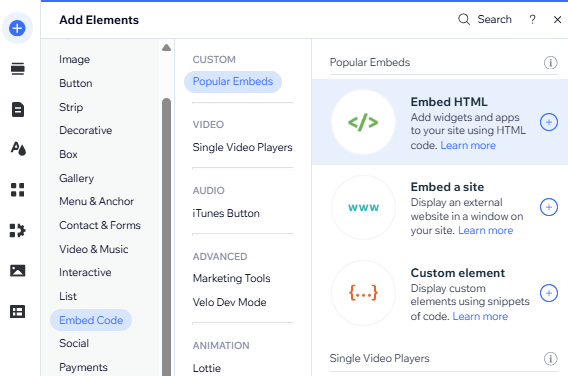
  1. Open the Wix Editor
  2. In the left sidebar, click AppsAdd Apps
  3. Search for Wix Members Area → click Add to Site
  4. Wix will auto-generate Sign Up, Log In, and My Account pages
  5. Publish or Preview your site to confirm users can register and log in

2. Turn on Dev Mode

  1. In the top bar of the Editor, click Dev Mode → Turn on Dev Mode
  2. This will open a code panel at the bottom and a Site Structure tree on the left

3. Store Your MindStudio API Key in the Secrets Manager

  1. Navigate to your Site Dashboard
  2. In the left menu, go to Developer Tools → Secrets Manager
  3. Click + Add Secret:
    Name: MINDSTUDIO_API_KEY
    Value: Paste your API key (you’ll find it in the Signed URLs tab of your Agent)
  4. Click Save

4. Create the Backend Web Module for Signed URLs

  1. Navigate back to the Wix Editor
  2. In the code tree, under Backend, click + Add Web Module
  3. Name it exactly signedUrl.web.js
  4. Paste the code below and replace the agentId with your own
  5. Click Save
// backend/signedUrl.web.js
import wixSecretsBackend from 'wix-secrets-backend';
import { members }         from 'wix-members.v2';
import { webMethod, Permissions } from 'wix-web-module';
import { fetch }           from 'wix-fetch';

export const generateSignedAccessUrl = webMethod(
  Permissions.SiteMember,
  async () => {
    // 1) Identify current member
    const member = await members.getCurrentMember({ fieldsets: ['FULL'] });
    const userId = member._id;

    // 2) Fetch your secret
    const apiKey = await wixSecretsBackend.getSecret('MINDSTUDIO_API_KEY');

    // 3) Call MindStudio
    const resp = await fetch(
      'https://api.mindstudio.ai/developer/v2/generate-signed-access-url',
      {
        method:  'POST',
        headers: {
          Authorization: `Bearer ${apiKey}`,
          'Content-Type': 'application/json'
        },
        body: JSON.stringify({
          agentId: 'PASTE YOUR AGENT ID HERE',
          userId
        })
      }
    );

    if (!resp.ok) {
      const errText = await resp.text();
      throw new Error(`Signing failed: ${errText}`);
    }

    const { url } = await resp.json();
    return url;
  }
);

You can find the Agent ID in the Signed URLs or in the Metadata section of your Agent settings

5. Add & Configure the Embed Element

  1. Add a Members Only page for your embedded Agent
  2. In the Editor’s left toolbar, click Add (+) → Embed Code → Embed HTML
  3. Set it to Website Address, and use a placeholder like https://example.com
  4. In the Properties panel (bottom of code panel), set ID to agentHtml

6. Write the Page Code to Fetch & Inject the Signed URL

  1. In the top-left dropdown, select the page where you added the Embed element
  2. Replace the contents of that page’s JS file with:
// Filename: Embedded AI Agent.js

import wixUsers from 'wix-users';
import { generateSignedAccessUrl } from 'backend/signedUrl';

$w.onReady(async () => {
  console.log('🛠️ onReady fired');

  // 1) Ensure user is logged in
  const user = wixUsers.currentUser;
  console.log('loggedIn?', user.loggedIn);
  if (!user.loggedIn) {
    await wixUsers.promptLogin();
    return;
  }

  // 2) Fetch the signed URL
  let signedUrl;
  try {
    signedUrl = await generateSignedAccessUrl();
    console.log('✅ Got signed URL:', signedUrl);
  } catch (err) {
    console.error('❌ Couldn’t fetch signed URL:', err);
    return;
  }

  // 3) Push it into the embed-as-site src
  console.log('🔗 Setting #agentHtml.src to signed URL');
  try {
    $w('#agentHtml').src = signedUrl;
    console.log('✅ .src assignment succeeded');
  } catch (e) {
    console.error('🔥 .src assignment failed:', e);
  }
});

7. Publish & Test

  1. Click Publish in the top-right of the Editor
  2. Click Preview

This is just a starter example, so feel free to tweak any of the steps

1 Like

@Alex_MindStudio thank you so much this was a tough one and that so far looks like it works. I appreciate this detailed description!

1 Like

@Alex_MindStudio Hi! My agent is on WIX. I was just checking the mobile version and it’s coming up strange. Can you help me show the agent in full instead of just a short piece? I attached an image so you can see what I am seeing on mobile.

@Alex_MindStudio -Checking in here, is there a way to see this in mobile version?

Hi @RacCaz,

Thanks for the follow-up!

I’m not a Wix expert, so it might be worth checking with others too, but here’s what I found:

  1. Wix has a Mobile Editor you can open by clicking the button shown in your screenshot. From there, you can drag the embed window to a larger vertical size for a better display:

  2. You can also adjust the HTML to make the iframe more responsive

Hope this helps!

@Alex_MindStudio Thank you I will try it!